Showing posts with label BlenderTips. Show all posts

July 17, 2022

Blender Addon - Fix Floating Point

https://github.com/mziskandar/Blender-Addon---Fix-Floating-Point

Fix floating point inaccuracy in Blender large object.


After installing and activating the Addon, MISC panel will appear and Fix Floating Point button can be use in object mode.


Finally, leaading minor inaccuracy will be truncated.

July 22, 2018

Blender UPBGE Addon: Bake Parallax

Parallax or relief texture enable pop-up effect on texture. I've posted the add-on on BA old forum eons ago.. and other samples in that forum are gone.


lordloki76 told me that its gona be on the UPBGE repository.

Download the addon from the link above if you dont have it, enable it and use it as follows.

Oh crap... I'm too lazy to write.. here's screencap.

Launch UPBGE

Enable 'Bake Parallax' Addon

Displace you simple Subdivided plane using height map

Create plane to bake parallax on a terrain

Bake as you normally bake

Create aother plane to use parallax

Assign diffuse and parallax

Adjust parallax

Adjust tiling if needed

Done.


June 27, 2011

Blender 2.5 & Ubuntu 3D View Shortcuts Clashes


Just a reminder for myself and maybe useful to others too..

After re-installing Ubuntu and Blender, my 'alt' + 'mouse left click' to rotate view in Blender won't work anymore. I know I did something before - but I seem can't remember what. Actually, it is just as simple as changing 'alt' key shortcut to using those 'windows' key in Ubuntu system.

System > Preferences > Windows

Choose Super (or "Windows Logo") then.. close.

Open up Blender. everything works again :)

It will helps Blender runs faster too. It won't clash with Ubuntu shortcut anymore.

Cheers and happy Blending!

March 29, 2011

Basic UV Mapping

Prepare Object.
Go to edit mode ("TAB key").
Then press select all faces ("a" key).
Then pree "u" key ti unwrap.
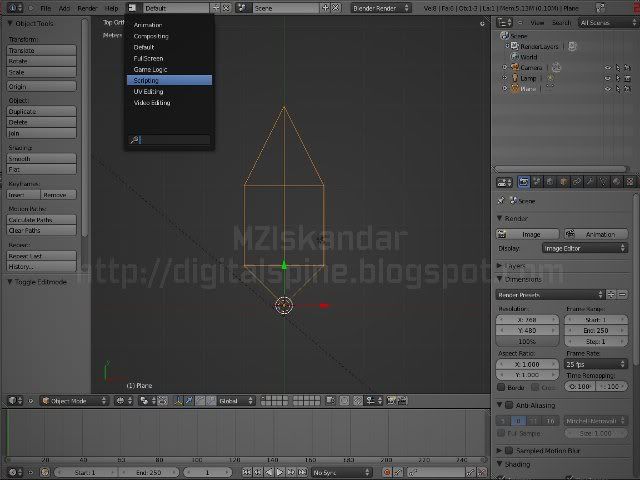
Go to "UV Editing" Layout.
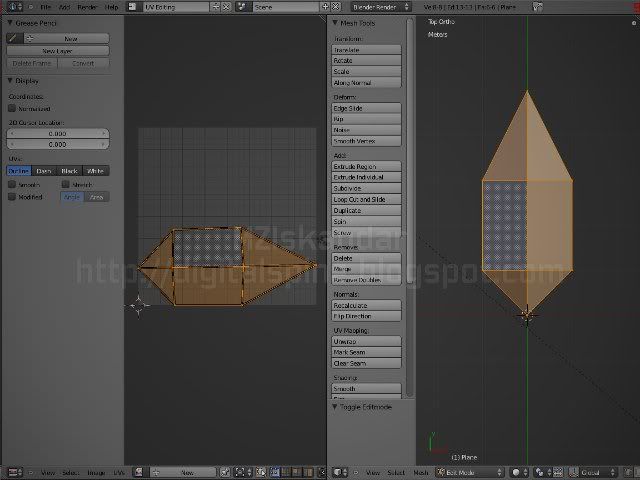
Select the object if not selected, go to edit mode (right pane).
You can see the unwrapped UV on the left pane.
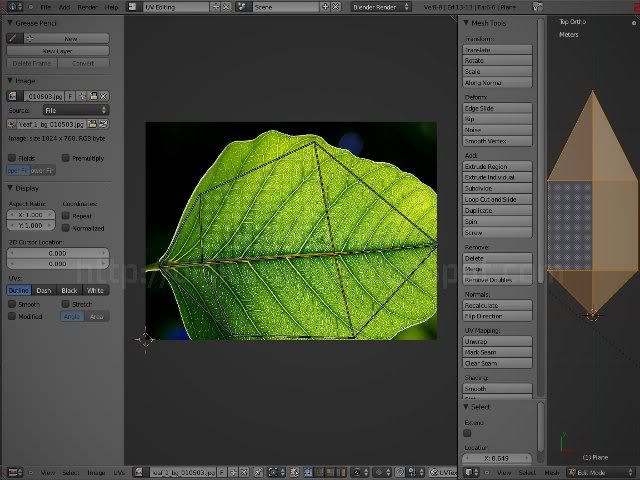
Open image at the left pane (bottom). Image > Open.
Select an image file.
Use the mouse right click and grab "G" key
..to adjust the UV vertices on the left pane.
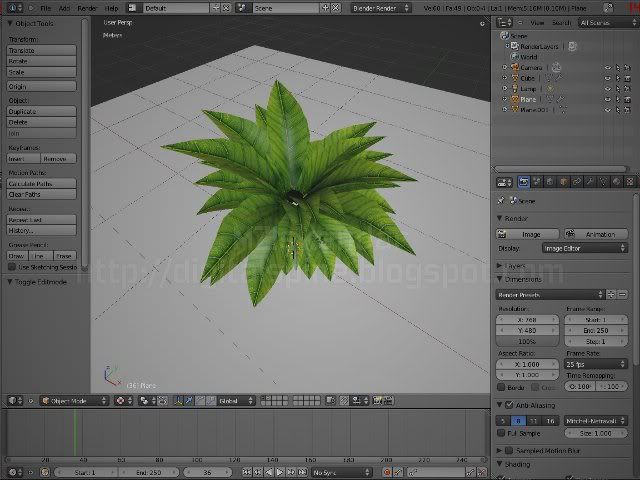
Done! Go to "Default" Layout and activate "Textured" mode.
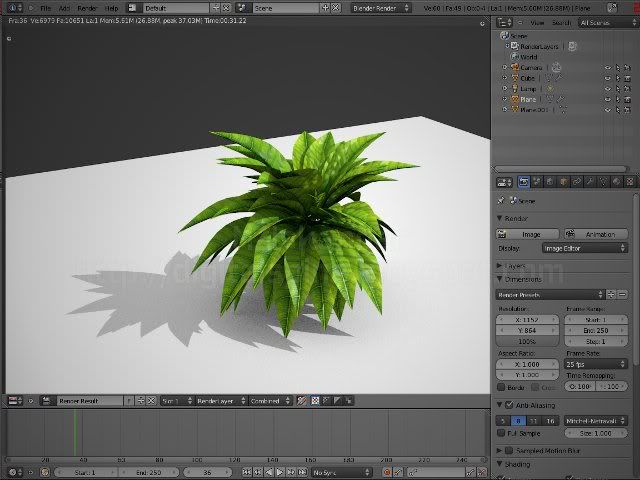
That's all folks. Here I'm using a small icosahedron with hair particles.
Attach the single hair object/group as a leaf.
Use "Convert" to make it usable in the game mode.

February 24, 2011

Simple "Path" Animation

Start Blender.
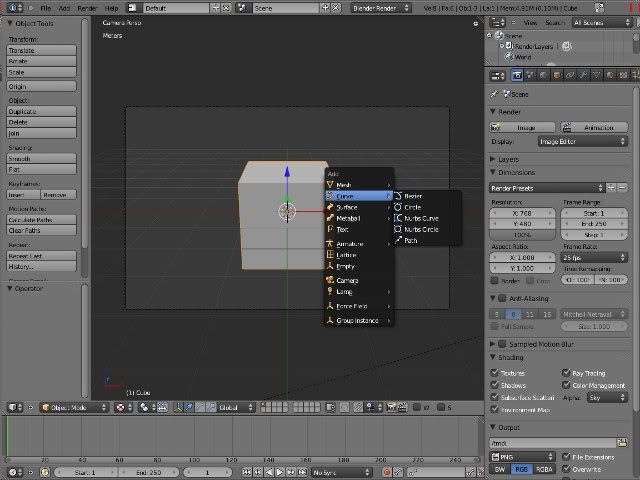
Add new "Curve" by using "Shift" + "a" key

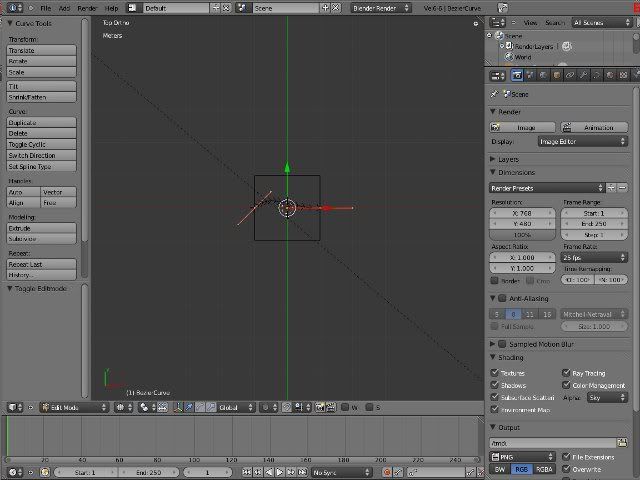
Go to wire-frame view mode
(So that you can see the added curve clearly.

Select the "Curve" by right clicking.
Go to edit mode using "TAB" keu.
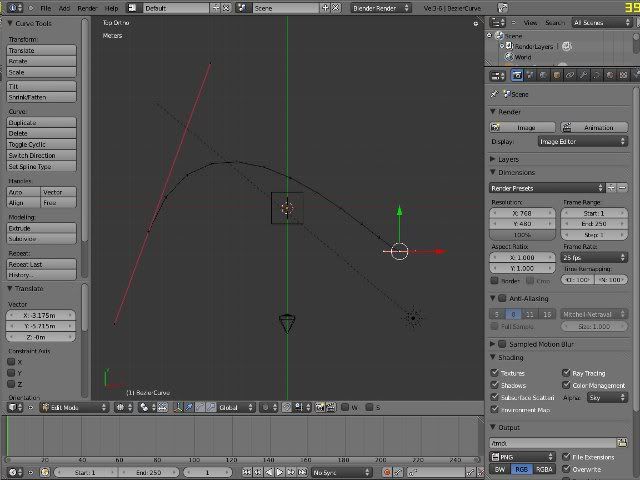
Adjust the curve points & handles using right click to select
and "g" key to move it around.

Choose the object to animate using right click.
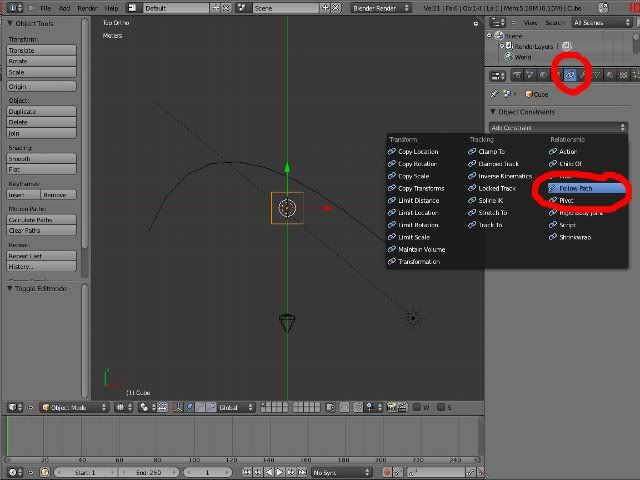
Go to object constraint panel.
Add constraint & choose "Follow Path"

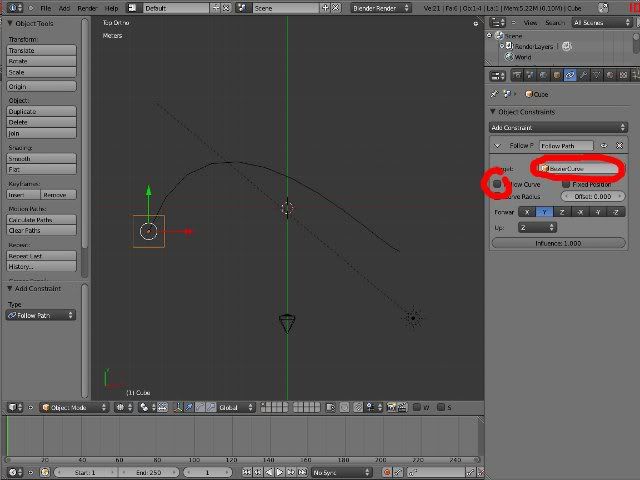
Choose target as your curve & enable "Follow Curve"

Go to start frame (eg: frame 1).
Select the curve.
Go to "Object Data" panel
Move mouse over evaluation time.
Press "i" key to insert frame.

Go to end frame (eg: 250)
Key in the end Frames (eg: 250)
Key in "Evaluation Time" (eg: 250)
Move mouse over "Evaluation Time".
Insert the key frame again using "i" key.
Done! Press "alt" + "a" to preview animation.

Simple Animation

Start a Blender!

Select object to animate by "Right Click"

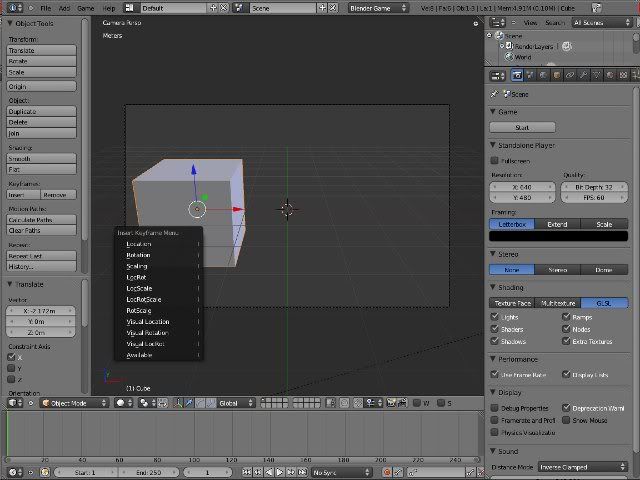
Go to the first frame. Move object to any start position (use "g" key)
then, press "i" key. Select "Location"

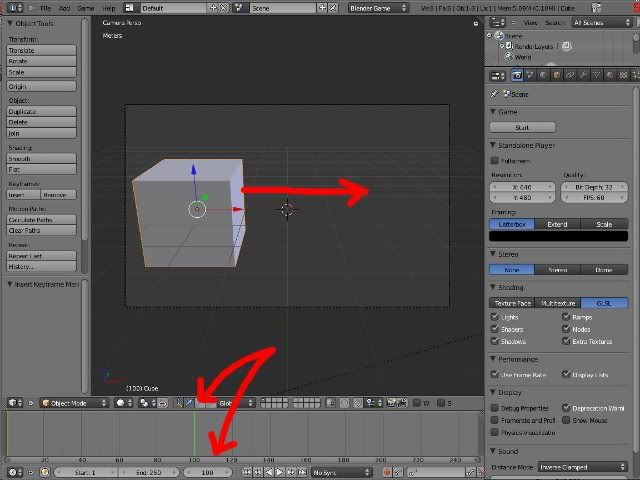
Drag to any end frame of your choice (eg: 100).

Move object to desired new location then, press "i" key again
and choose "Location"

Done! Press "Alt" + "a" to preview/run the animation!

February 17, 2011

Simple AI [Collision Avoidance]

Adding more text soon...

January 28, 2011

Rendering Animation

Untuk Render animasi yang telah siap,

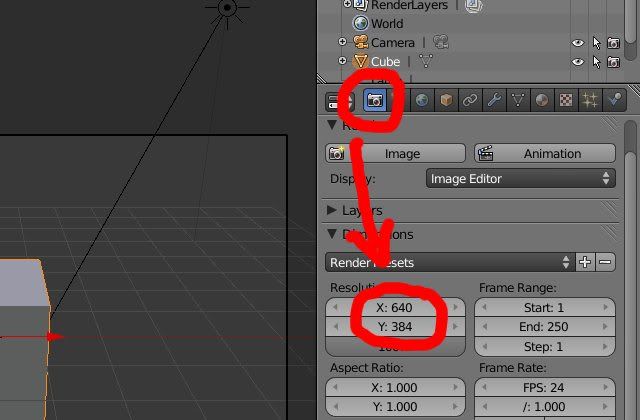
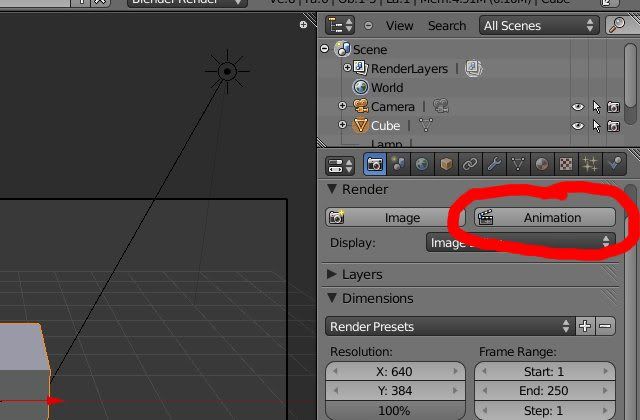
Pergi ke "Properties Panel" (Default View) LeftHand Side, Click Icon Render (gambar camera).


Setkan size Rendering.. contoh: X = 1080, Y = 720
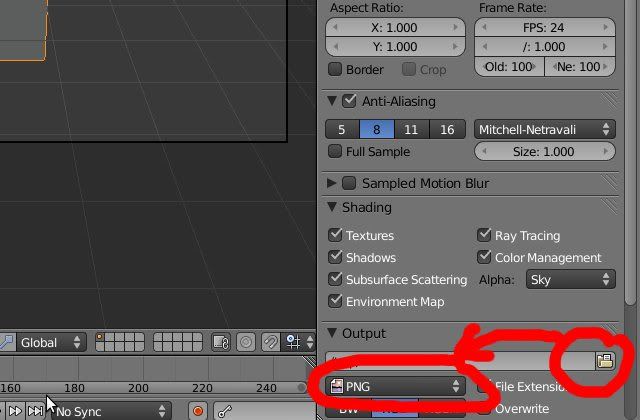
Kemudian, setkan lokasi file animation yang akan dirender.
Setkan "File Type" contoh: MPEG


Akhir sekali, Click button Animation.. pastu.. tunggu aa sampai animation siap dirender..


Animation yang siap di"render" akan di"save"kan pada lokasi yang telah dipilih dalam harddisk.

Panjang Selected Edges & Faces

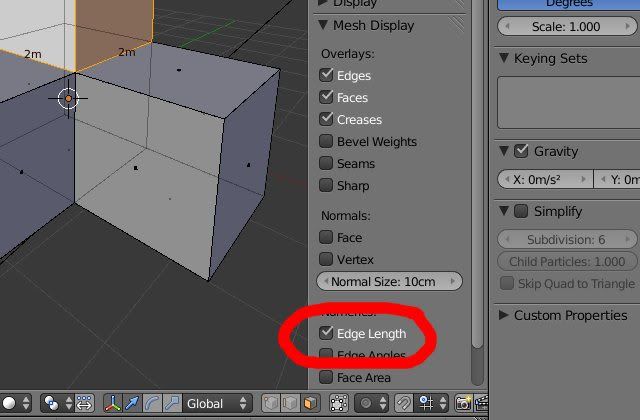
Memaparkan Panjang Selected Edges & Faces in Blender.


  1. Pilih object
  2. Tekan "n" untuk Numerical Panel
  3. Pastikan berada didalam "Edit Mode" (Tekan "Tab")
  4. Pilih Faces atau Edges pada object pada 3D View
  5. Tick Edge Length pada Numerical Panel


December 7, 2010

The Making of.. F-35

Sorry guys, this time in Bahasa Melayu..

F-35 pengganti Eagle, Hornet & Falcon. Ada banyak variasi unik. Menggunakan minyak RON95 Petronas. Full tank RM 30. Tank dia saiz kancil. Problem dia satu jek ~ nak parking kat petrol pump susah sket - kalau berjaya, mungkin dapat impress Petrorita (awek cun kat Petronas Manjalara). Teringat lak aku kat dia. Apa khabar agaknya? Bila ingat dia, ingat lak si Mizie. Lama tak nampak. Dulu, time-time ada kedai machine detox free kat kedai depan tu, slalu gak jumpa dia time sembahyang Jumaat ~ ko siap ngulau ek?

Terima kasih kerana membaca mukadimah merepek aku. So? Sukati aku aa.. nak lompat-lompat ke, nak straight to the point ke, whatever..

Aku suka collect technical documents especially about aircraft . Fighters, helos, etc. Motive? Takde motive pun. Bukannya dapat jenjalan bawak awek dating dalam tu pun... arghh! dah start nak merepek balik... Sorry..

PDF nie aku dapat dari Lockheed kot. Link dia aku tak ingat. Belek-belek tengok gambar je. Cantik! 


Kalau kat Windows, aku pakai Foxit reader nak bukak PDF. Ringan sket. Aku nyampah ngan Adobe - especially bila dia install sekali auto-update, antivirus. Dah terinstall, susah nak uninstall. Kat Windows, aku pakai Avast Home Edition. Free!

Download Avast percuma kat sini!
Download Foxit percuma kat sini!

Untuk buat 3D modeling, aku pakai Blender 3D (Windows, Linux & Mek Siti).

Download Blender percuma kat sini!

Sebelum buat 3D, sediakan blueprint. Pandangan sisi, pandangan atas dan pandangan depan. Edit, resizing, manipulation of images aku pakai GIMP. GIMP nie macam Photoshop. Tapi, lagi best sebab amat ringan. Portable pun boleh. (bukan hanya sebab ianya percuma)

Download GIMP percuma kat sini!

Dalam Blender, mula ngan kotak bodoh je.

Ceraikan kotak tu. tinggalkan permukaan (planes) bawah, sisi & depan je.


Pastu, taruk textures/images kat planes tu. Kalau nak pakai the whole kotak, bleh gak. Buat aaa sky box. Lagi cun. 


Aku mulakan dengan satu titik (point/vertex). Daripada satu point, tarik buat line sikit-sikit ikut pandangan dari atas. Actually, dari memana pun bleh. Ikut sukati korang aa. Mungkin cara aku lain, cara korang lain. Cara berbeza, tak bermakna cara aku salah.

Aku prefer ikut grid, lebih kurang dalam accuracy 0.001 je. Sebab, computer aku tak power. So, bila buat OpenGL, takde fail tu jadi besar gedabak. Loading pun laju.


Lepas buat tracing pandangan atas, kat 3D view, aku tarik points (vertices) untuk bagi depth kat Z-axis. Memana vetices terputus yang perlu sambung, aku sambung. Lines between vertices nie hanyalah guide je sebelum buat actual polygons. 


Memana perlu lines perlu tambah, aku tambah untuk mendapatkan lebih detail. 


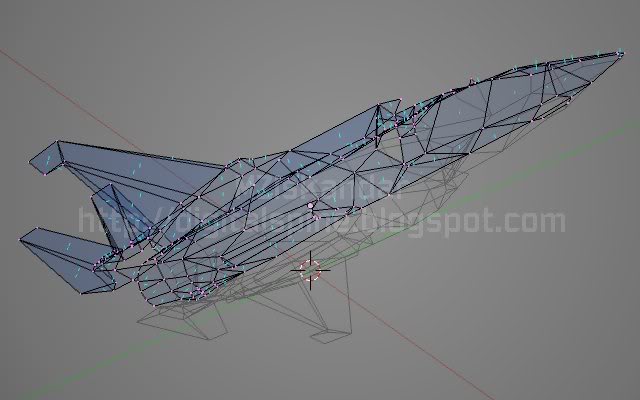
Bila dah rasa okay dan bila dah rasa bosan tambah lines, aku buat meshes/polygons lak mengikut - sambung 3 atau 4 points/vertices - atau sambungan antara 2 lines.


Time nie, ada meshes/polygons yang memerlukan line extra. Tambah bila perlu. Mana yang tak perlu tu, buang je.


Computer aku tak power. So, aku akan meminimakan penggunaan points/vertices, lines, meshes/polygons. Lagi sikit lagi bagus. Dalam masa yang sama, mementingkan quality. Smoothing dengan "Edge Split" 30 degrees. Buat/ajdust "Creasing" cecantik.


Untuk mencarik kecacatan - model kurang upaya, aku taruk texture sementara yang berkilat - senang nak check kalau-kalau ada polygons yang terputus atau tak cantik.


Tambah rough parts sket-sket. Tayar, exhaust, kipas, etc. as a guide. Time nie aku tambah scripting supaya boleh gerak-gerak. Objects yang menjadi child akan diikat dengan bones/armatures. Pergerakan parts akan effecting parts yang lain.


Sambil-sambil tu, tambah decals sket. Aku buat decals dalam Blender as 3D object. Decals tadi akan dirender menggunakan orthographic camera. to produce images. Patu baru di UV maps kan ke 3D model.


Sekian sahaja untuk part 1. Kalau rajin nanti continue part 2..

Nota kaki ayam: Segala maklumat dan watak adalah rekaan semata-mata. Pale ada weng sket!...